DNS and SSL problems usually start with one innocent assumption: “I changed the right setting.” The safer approach is to decide where DNS is managed, change one layer at a time, and verify before you move on.
Most readers come here with the same operational questions. Should I use my hosting provider’s nameservers or keep DNS at the registrar? When do I use an A record instead of a CNAME? Which records matter for email, not just the website? Why does SSL say pending after I already pointed the domain? And how do I make these changes without creating a Friday-afternoon outage?
This guide is written for site owners, small teams, and agencies that need a calm, control-panel-first workflow. It covers two common DNS setups, the record types you will actually touch, the right order for website and email changes, and what to check before you request SSL. If you need the wider service picture first, the services overview gives the broader context for hosting, email, DNS, and support.
Written by Lena Ortiz
Updated May 17, 2026
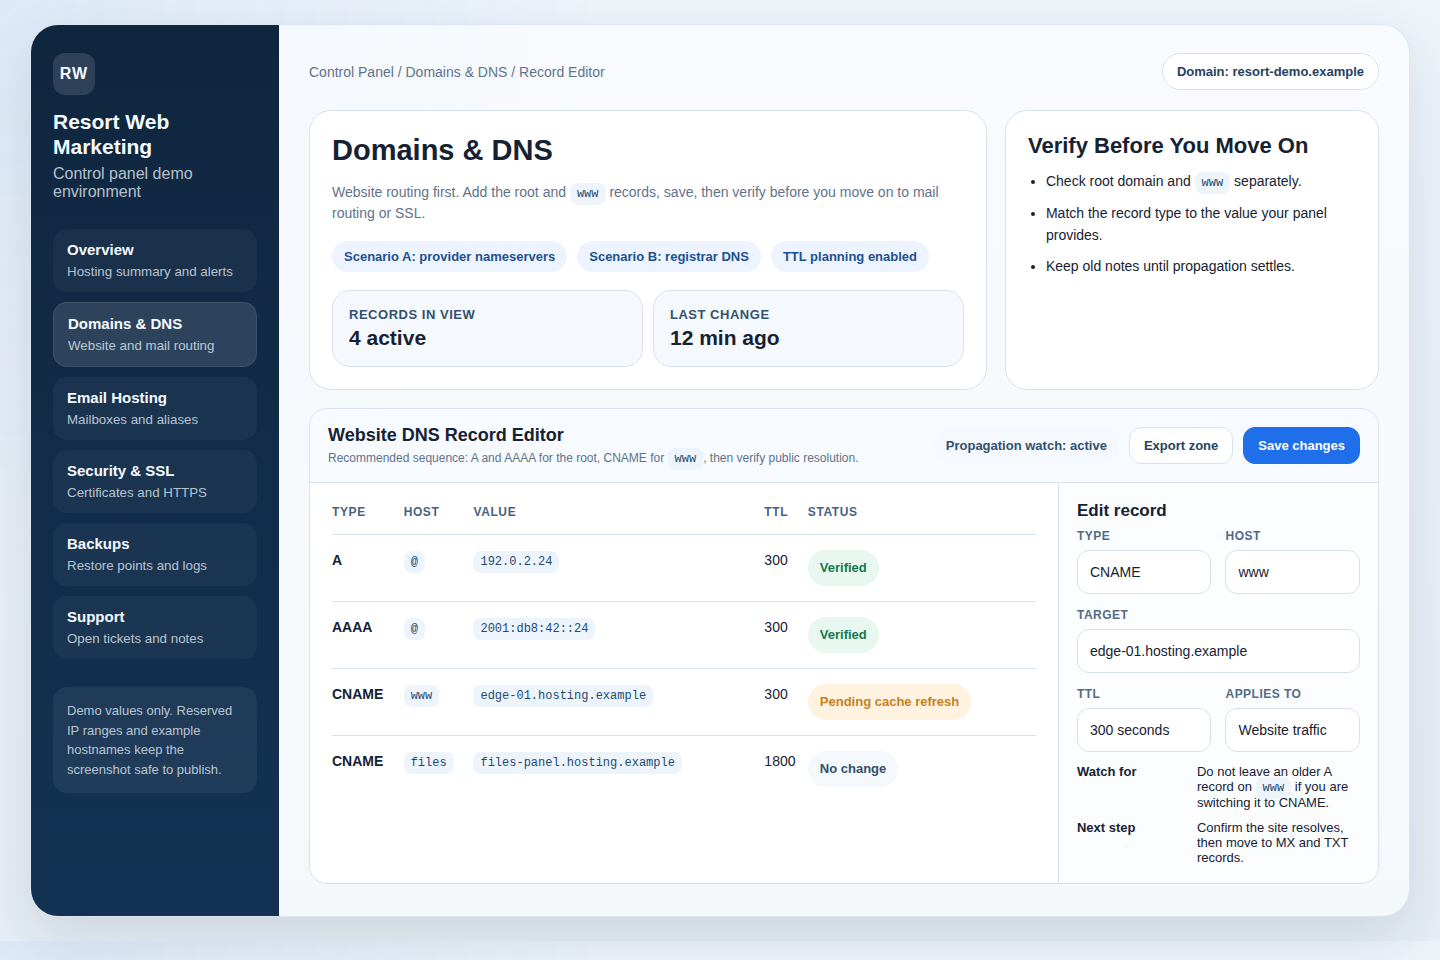
www next, then verification before you move to email or SSL.What DNS and SSL Actually Do
DNS is the instruction layer for your domain. It tells browsers where to find your website and tells mail systems where to deliver your email. SSL is the encryption and identity layer that lets visitors reach the site over HTTPS once the domain is pointing to the right place.
The order matters. Point the website first, make sure email routing is intact second, then request or enable SSL last. I have seen this pattern before: teams ask for a certificate while DNS is still half-updated, then spend the next hour troubleshooting the wrong layer.
These are the record types you will usually work with:
| Record Type | What It Does | Typical Use |
|---|---|---|
| A | Points a hostname to an IPv4 address | Root domain or a host that should resolve directly to a server IP |
| AAAA | Points a hostname to an IPv6 address | Used when your hosting setup provides IPv6 routing |
| CNAME | Points one hostname to another hostname | Common for www or service subdomains |
| MX | Routes inbound email to mail servers | Required if you want domain-based email to keep working |
| TXT | Stores verification and email policy values | SPF, DKIM, ownership checks, and related mail settings |
One more term matters: TTL. Think of TTL as how long caches remember a DNS answer before they ask again. Lower TTL can make planned changes show up faster. Higher TTL can make old answers linger longer. DNS records are not interchangeable, despite occasional efforts to negotiate with them.
Before You Start: Gather the Right Details
Open your control panel and collect the values before you edit anything. The basic checklist is short:
- Domain name: confirm the exact domain and whether you are changing the root domain,
www, or another subdomain. - DNS location: confirm whether DNS is managed at your provider or at the registrar.
- Website target values: the IP address or hostname shown in your hosting setup.
- Email values: MX targets, priorities, and any SPF, DKIM, or verification TXT values listed in the panel.
- Change window: choose a low-risk window and avoid changing unrelated records at the same time.
If you are unsure where DNS lives, run the simplest possible check: look at the domain’s nameserver settings. ICANN Lookup can help you confirm the current registration details, while your registrar account shows the live nameserver choice you can edit.
It is also worth writing down the current values before you replace them. A basic rollback note is often enough: old A record, old CNAME, old MX entries, old TXT entries, and when you changed them.
Two Common Setups: Pick Your Scenario First
The workflow depends on where DNS is managed. The values you enter may be similar in both setups, but the interface and operational tradeoffs differ.
| Scenario | Best Fit | What Changes | Operational Tradeoff |
|---|---|---|---|
| Scenario A: Use your provider’s nameservers | You want one place to manage hosting, DNS, email, and SSL | You point the domain’s nameservers to the provider, then manage records inside the provider dashboard | Usually simpler day to day, but it moves DNS control away from the registrar interface |
| Scenario B: Keep DNS at your registrar | You already manage several services there or need to keep DNS in one registrar account | You leave nameservers as they are and enter the hosting values manually in the registrar’s DNS editor | More moving parts, but sometimes the right fit for agencies or split-service setups |
A reasonable default is Scenario A if you want fewer places to manage. Scenario B is still valid; it just asks for more discipline because the control panel will show the correct values, but you will apply them somewhere else.
Use this mini-check before you continue:
- If the nameservers already point to your provider, you are likely in Scenario A.
- If the nameservers still point to the registrar or another DNS service, you are likely in Scenario B.
- If you are not certain, do not start editing records until that answer is clear.
Choose Scenario A when you want one operating view, you prefer fewer handoffs, and you do not have another strong reason to keep DNS elsewhere. Choose Scenario B when the registrar already manages several active services for the domain, your agency has a fixed DNS process there, or you need to preserve an existing DNS workflow across multiple providers. Neither choice is universally best. The best fit is the one you can document, verify, and maintain without guesswork.
DNS Records You Will Likely Touch
Here is the practical version of when to use each record:
- A / AAAA: use these when your control panel gives you one or more server IP addresses for the website.
- CNAME: use this when the panel gives you a hostname target instead of a direct IP, commonly for
www. - MX: use these exactly as provided for inbound mail. The priority values matter because they tell receiving systems which mail server to try first.
- TXT: use these for SPF, DKIM, and verification values. They help with deliverability, ownership checks, and spoofing protection.
Two warnings are worth slowing down for:
- Do not put a CNAME and an A record on the same hostname unless your DNS provider explicitly supports a special flattened setup and tells you to use it.
- Do not change MX records just because you are moving the website. Website routing and email routing often need different record sets.
If your DNS provider exposes TTL controls, lowering TTL before a planned change can help reduce how long older answers linger. If it does not, that is fine. Just plan for propagation and avoid stacking unrelated edits together.
Step by Step: Point Your Domain to Your Website
This is the website-routing sequence I recommend because it keeps verification simple.
- Open Domains & DNS. Start in the DNS area of your control panel. If you are in Scenario B, use the values shown there but make the edits in the registrar’s DNS interface.
- Choose the correct hostnames. Confirm whether you are editing the root domain,
www, or another hostname. Root andwwware easy to confuse and easy to misplace. - Add or update the website records. Use A or AAAA if the panel gives IPs. Use CNAME if the panel gives a hostname target.
- Save and wait. Changes may appear in minutes or may take a few hours to settle broadly, depending on TTL and cached answers.
- Verify before you move on. Check your control panel’s status tools if available, then confirm the public domain resolves to the expected website.
If the site is built on WordPress.org software, make one extra check after DNS and SSL: confirm the site’s configured URLs and redirects are aligned with the live domain and HTTPS version. DNS can be correct while the application still prefers an older host or protocol.
Common website-routing mistakes
- Wrong host: you updated
wwwbut not the root domain, or the reverse. - Wrong record type: you used a CNAME where the panel required an A record, or vice versa.
- Conflicting records: old records are still active for the same hostname.
- Forgotten subdomain: the website works on one hostname but not the public version users actually type.
If you want the broader service path after the DNS change is complete, use Manage Hosting to review the hosting side of the setup from the same account.
Step by Step: Set Up MX Records for Email
Email deserves its own sequence because it is easy to break by assuming the website records cover everything. They do not.
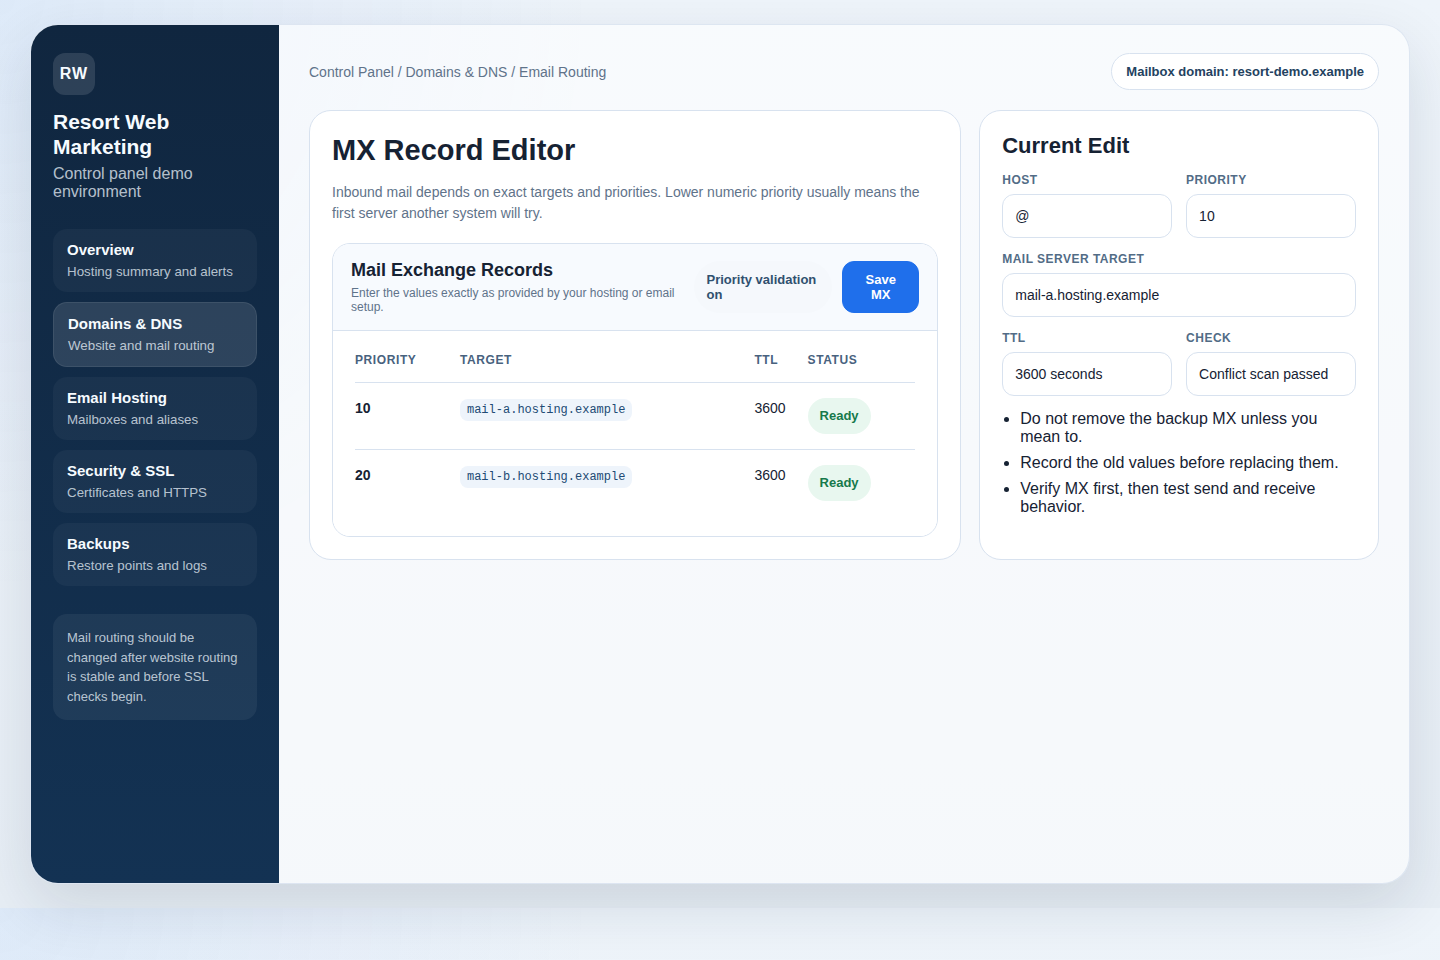
- Open the MX editor in Domains & DNS. Locate the mail-routing section in the control panel.
- Add the MX records exactly as provided. Use the mail server targets shown in your hosting or email setup.
- Set priorities carefully. Lower numeric priority usually means higher preference, but follow the values shown in your system instead of guessing.
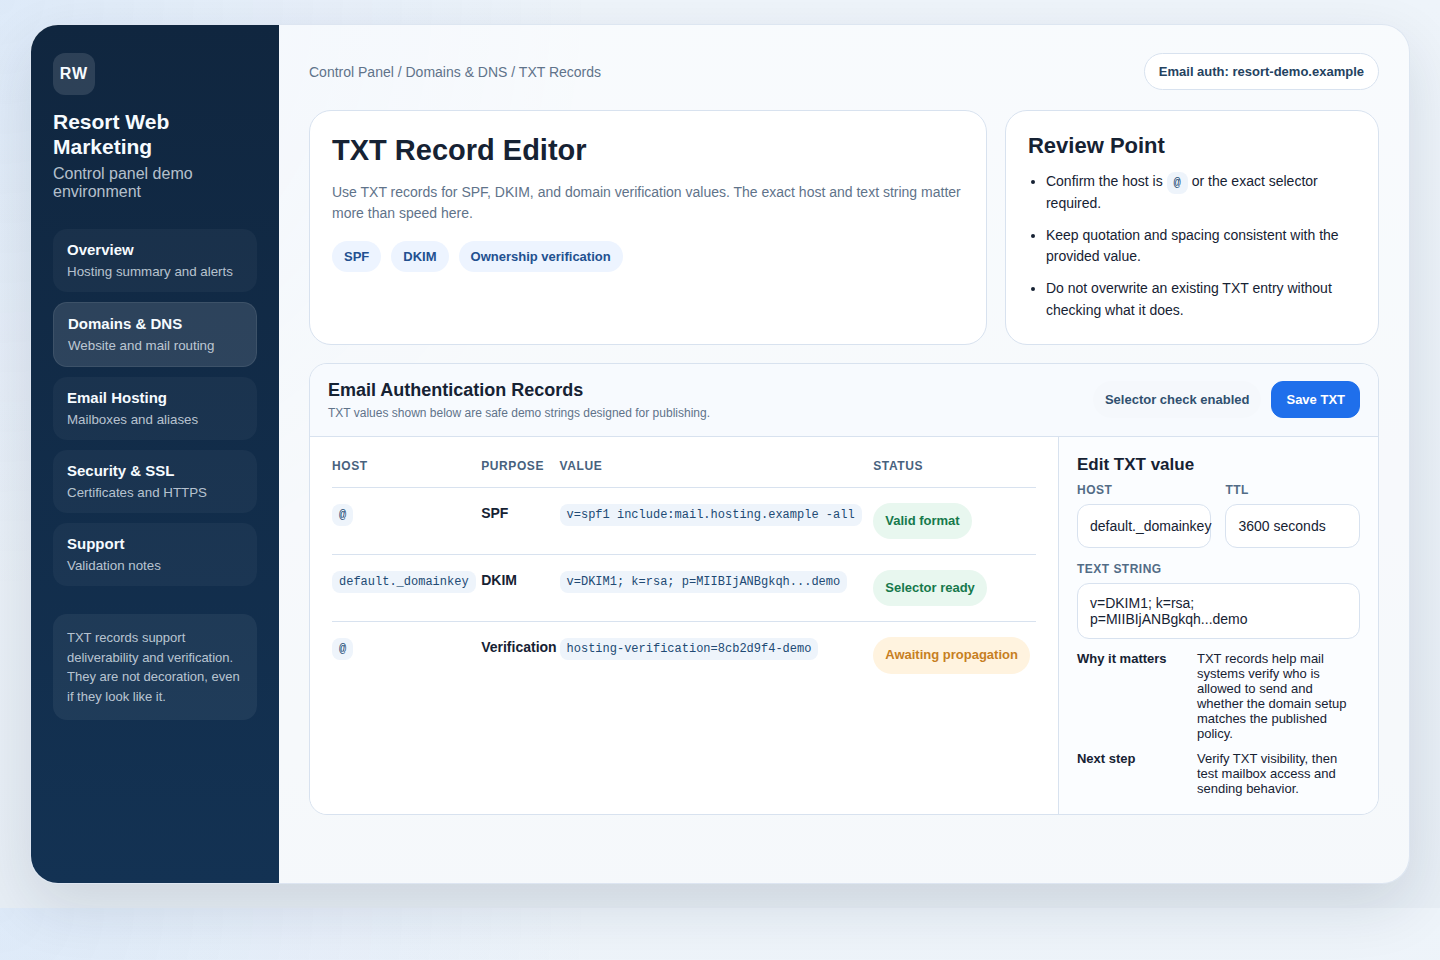
- Add TXT records for SPF, DKIM, and verification. These support deliverability, domain verification, and message trust.
- Save and wait for propagation. Mail routing changes can take time to appear consistently.
- Verify before assuming email is fixed. Confirm that the expected MX and TXT records appear in DNS, then test mailbox behavior.
For small teams, the practical goal is not “perfect DNS purity.” It is reliable mail flow with fewer surprises. That is why I recommend keeping email second in the sequence: website first, email second, SSL last.
If you are also managing mailbox creation, aliases, or webmail access, the next relevant page is Email Hosting. It covers the account-side work that happens after MX and TXT are in place.
If you need a reference point for DNS behavior during propagation, Cloudflare’s DNS explainer is a useful plain-language overview for teams that want the mechanics without turning this into a networking seminar.
How SSL Fits In
Once the website is pointed correctly and the main hostnames are resolving where you expect, move to Security & Backups or the SSL area of your control panel.
- Open the SSL section. Look for the certificate or HTTPS status panel for the domain.
- Request or enable SSL. Use the control-panel workflow rather than trying to troubleshoot the certificate first from the browser side.
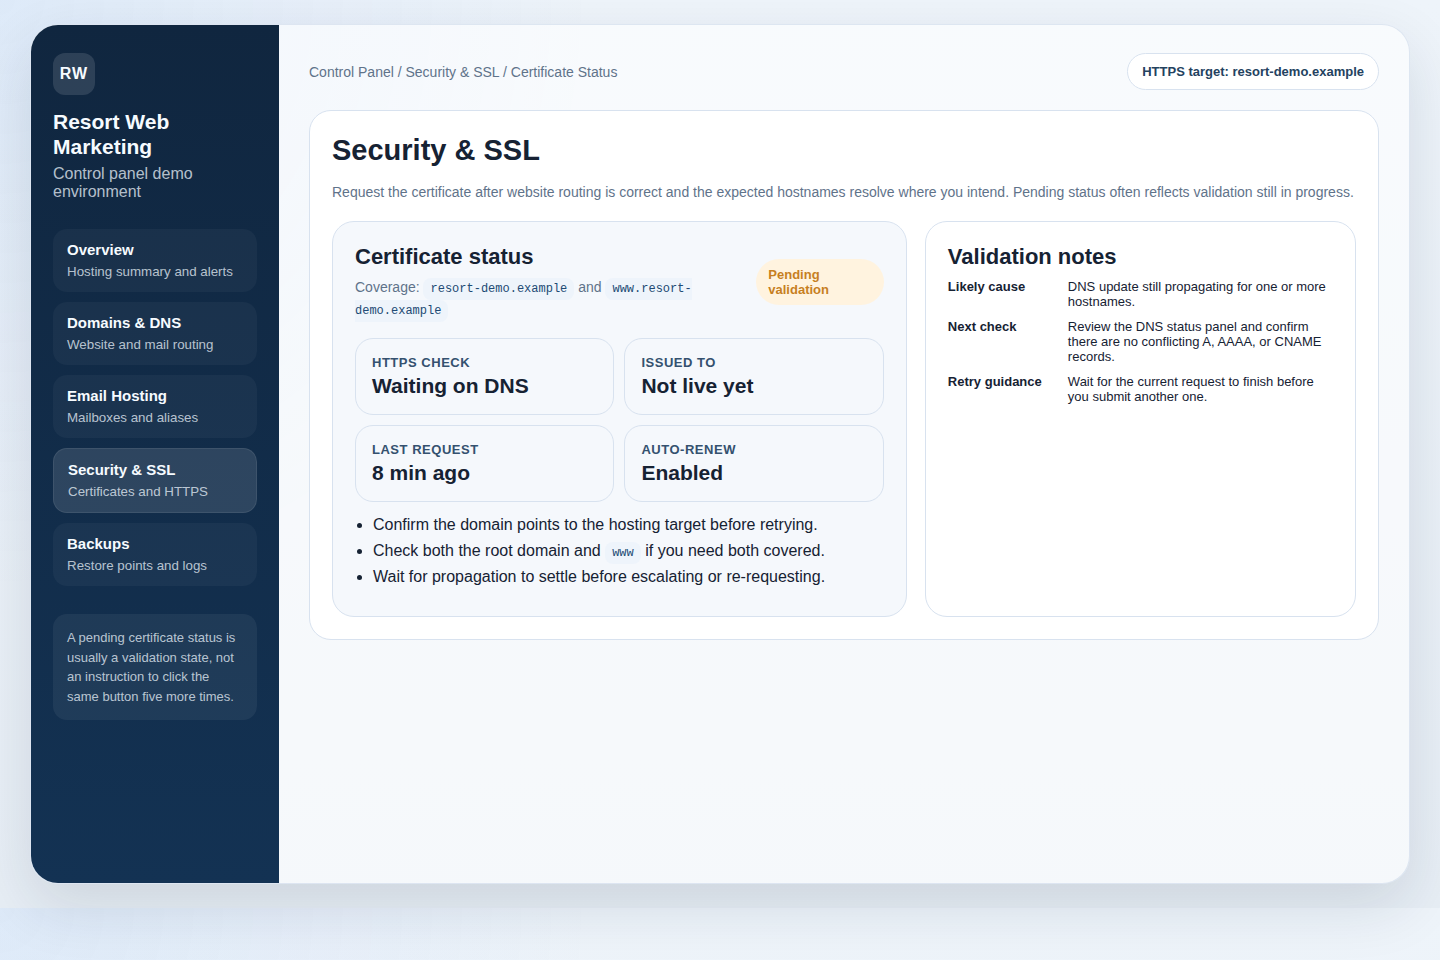
- Watch the status. If the panel says pending, that usually means issuance or validation is still in progress.
- Wait before retrying repeatedly. If DNS was just changed, the SSL workflow may need time to see the updated domain state.
- Confirm coverage. Check whether both the root domain and
wwware included if you need both live.
What “pending” usually means
Pending does not automatically mean broken. It usually means the system is still validating domain control, waiting for DNS propagation, or finalizing issuance. What matters is whether the domain is reachable on the expected hostnames and whether the status eventually advances. Re-requesting the certificate every few minutes tends to create noise, not clarity.
If the site runs on a custom workflow or client management stack, agencies sometimes keep a DNS change log or deployment checklist in shared tooling. A lightweight web app generator can be one way to build that kind of internal operations dashboard without tying it to the public website itself.
Troubleshooting Checklist
When something fails, map the symptom to the most likely cause instead of changing five more records. The boring checklist is usually the fastest one.
| Symptom | Likely Cause | What to Check |
|---|---|---|
| Website does not load | Wrong A/AAAA/CNAME, conflicting records, wrong hostname | Compare the live DNS values to the control-panel values for the root domain and www |
| Website loads on one hostname only | One hostname was updated and the other was missed | Check root versus www routing and redirect behavior |
| Email stops arriving | Missing or incorrect MX records | Review MX targets and priorities exactly as shown in the panel |
| Email sends poorly or fails verification | Missing SPF, DKIM, or other TXT records | Confirm the TXT records were added to the correct hostname with the exact values |
| SSL stays pending | DNS is not fully propagated or the domain is not pointing correctly yet | Check domain reachability, hostname coverage, and SSL status details in the panel |
| Changes seem inconsistent between devices | Cached DNS or browser state | Wait, test from another network, and remember that TTL affects how long older answers can persist |
Local caches matter too. A browser or device may still show an older answer even when the public DNS is mostly updated. That is one reason propagation checks can feel contradictory for a while. The better question is not “Which tool is lying?” It is “Am I looking at stale cache, stale TTL, or the wrong hostname?”
If the issue is account-side rather than DNS-side, use the shortest escalation path. Contact Support when the values in the control panel and the public result do not line up after a reasonable wait.
Best Practices for Agencies and Multi-Site Owners
Multi-site work rewards consistency more than cleverness. These habits reduce avoidable mistakes:
- Use record templates. Keep standard DNS layouts for production, staging, and mail-enabled domains.
- Standardize naming. Be consistent about root,
www, mail hosts, and environment labels. - Document where DNS lives. Put “provider nameservers” versus “registrar DNS” in every client record.
- Batch changes carefully. Website first, email second, SSL last. Verify each layer before moving on.
- Keep a rollback note. Save the values you replaced so you can revert quickly if needed.
A shared operations repository can help here. Some teams keep DNS templates, hostname inventories, and cutover checklists in GitHub so everyone works from the same current record set instead of old screenshots and memory.
The safest operational default is still the simplest one: pick the scenario that matches your setup, make one category of change at a time, and verify before you continue. If you are ready to apply that workflow on a live environment, Request Hosting Plan or Get Started with a setup that keeps DNS, email, and SSL visible from one working control panel.