Backups usually fail in real life for ordinary reasons, not dramatic ones. Nobody checked what was included, nobody tested a restore, and “daily backups” sounded more comforting than specific. A backup you never test is a bit like a fire extinguisher you have only admired from across the room.
Most site owners come to this topic with the same practical questions. If something breaks, what exactly can I restore? Does the backup include website files, the database, and email, or only part of the story? How much downtime should I expect? And if email seems “missing,” how do I tell whether the messages are gone or just not routing where they should?
This guide turns backups into a simple restore workflow you can actually use. It is written for small teams managing a business site, business email, and everyday changes from one control panel. You do not need to be deeply technical to prepare well. You just need to know what to check, what to record, and what to ask before the awkward day arrives.
Written by Maya Collins
Updated May 24, 2026
Why Backups Fail in Real Life
Backups fail less often because the storage vanished and more often because the restore plan was fuzzy. I have seen the same pattern in a lot of support-heavy website situations: someone knows backups exist, but not what they cover, how long they are kept, or how to get from “the site is broken” to “the site is working again.” That gap is where stress grows.
There are usually five ordinary weak spots:
- No restore test: the team assumes recovery works because the control panel says backups are running.
- Unclear scope: files are backed up, but the database is not, or email accounts are included while mailbox contents are not.
- Unclear retention: “daily” sounds solid until you realize there are only a few restore points available.
- No downtime expectation: nobody knows whether restore is self-service, support-assisted, or likely to interrupt the live site for a while.
- No incident checklist: people improvise while the website, email, and domain settings are all in play.
For a typical WordPress setup, it helps to think in three separate buckets: website files, the database, and email. Files include themes, plugins, media, and configuration items. The database usually holds pages, posts, settings, forms, and other site content. Email is its own track entirely: mailbox accounts, passwords, quotas, and message history are not always restored the same way as a website. If you are comparing options on the home page or reviewing a current Website Hosting setup, that distinction matters more than the marketing label.
The goal here is simple: prepare a safe 5-step restore plan before an incident, then keep a short verification checklist for the website and email side afterward.
Step 1: Know What’s Included (Files, Databases, Email)
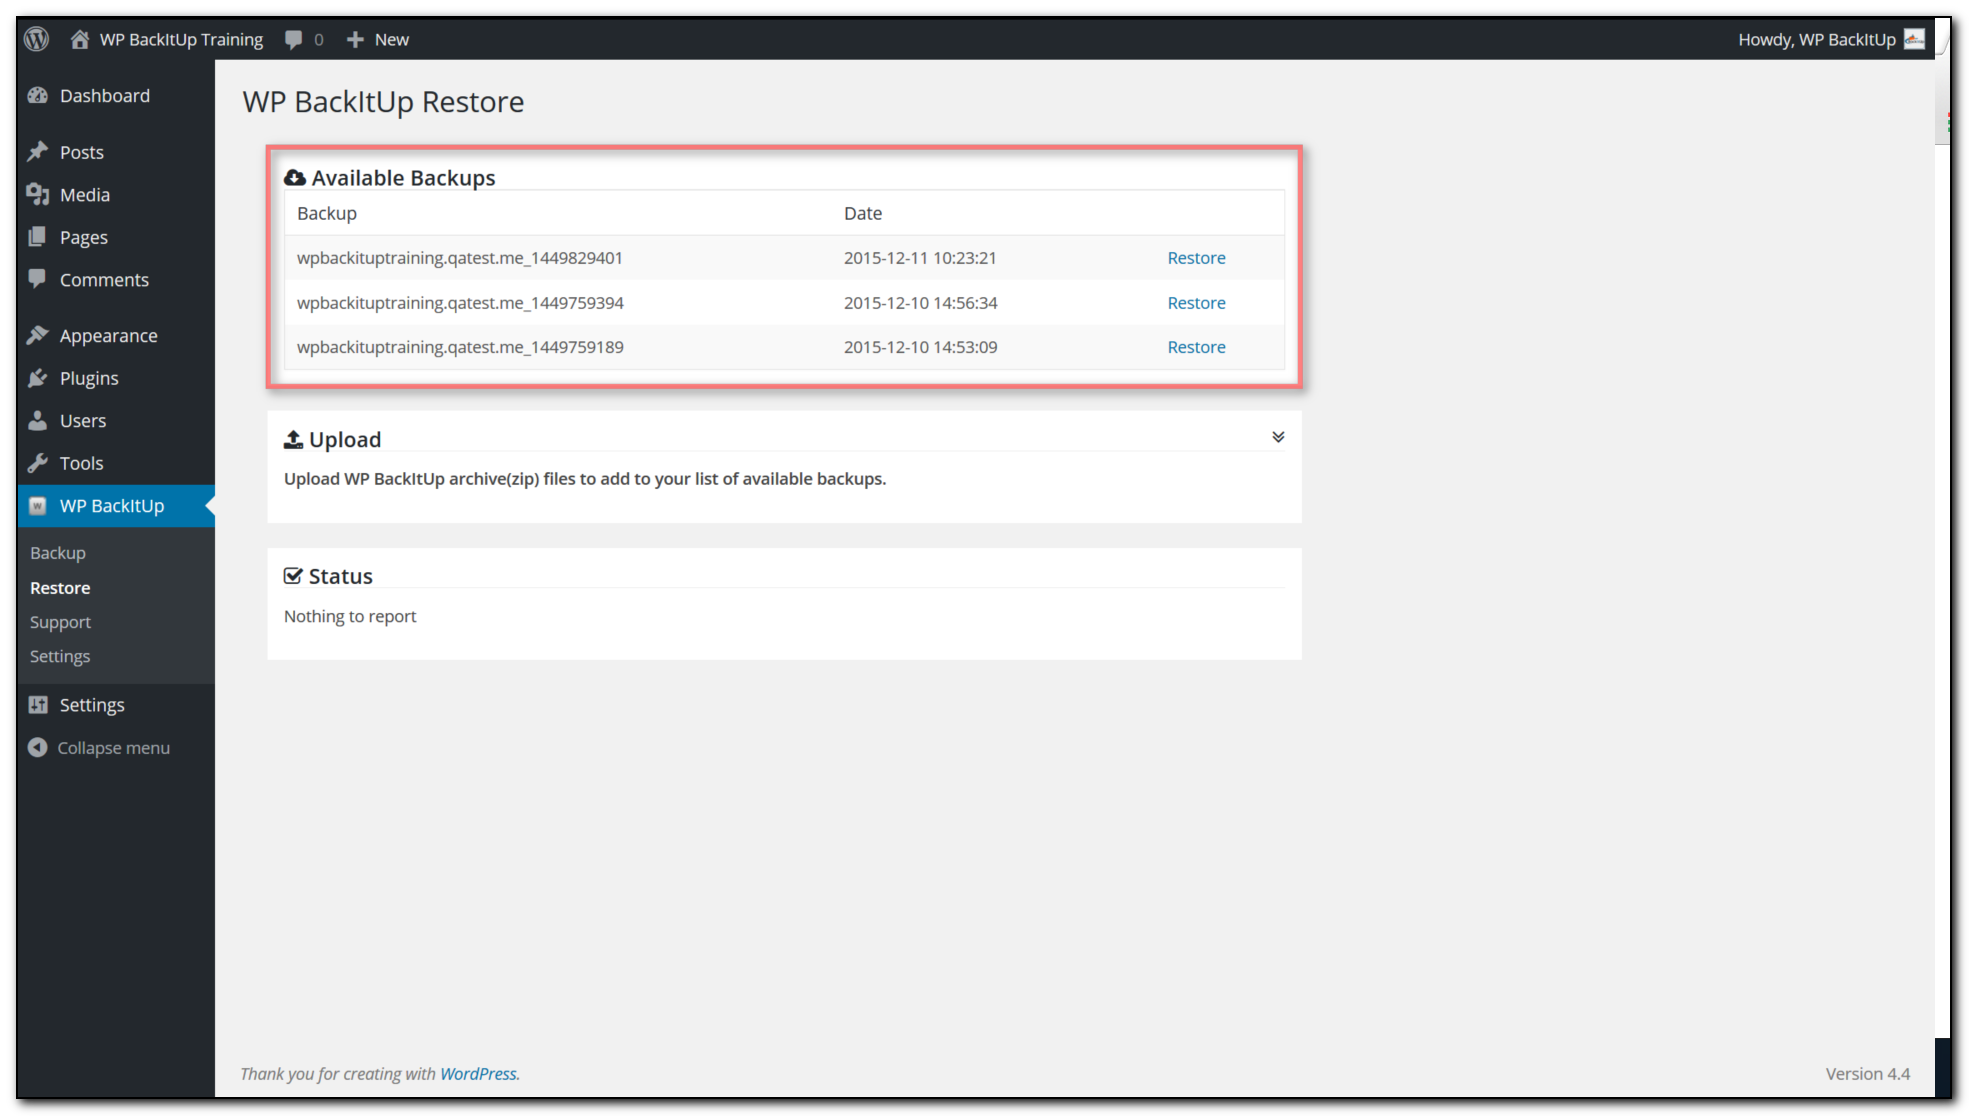
The first question is not “Do we have backups?” It is “What exactly is in them?” Open the backup or restore area of your control panel and look for labels such as Backups, Restore Points, Backup List, Recovery, or Restore Log. You are looking for three buckets:
| Bucket | What It Usually Contains | Why It Matters During Restore |
|---|---|---|
| Website files | Theme files, plugins, uploads, media, configuration files | Useful when code, templates, or uploads were changed or removed |
| Database | Posts, pages, settings, forms, menus, product data, user records | Critical when content or site settings broke even though the files are still present |
| Mailbox accounts, quotas, passwords, aliases, and sometimes message data | Email recovery often requires separate checks for access, routing, and message history |
This distinction matters because restoring only files may not fix a broken WordPress site. If the database contains a bad plugin setting, a broken option, or damaged content, file-only recovery may leave the problem in place. The reverse is also true: restoring only the database may roll back content and settings while leaving changed files in place. That is why the control panel should show scope clearly.
A simple example helps. If someone deletes a media folder by mistake, file restore may be enough. If a plugin update changes database options and the site starts throwing errors, you may need a database restore or a full-site restore. If an employee mailbox disappears, you may need email account recovery plus message verification, not a website rollback.
While you are in the panel, look for logs or restore history. Even basic logs tell you something important: when the backup ran, what kind of backup it was, and whether restore actions are recorded. A visible log is reassuring because it turns recovery into a process instead of folklore.
Manage Hosting if you already have an account and want to confirm where these controls live. If the scope is unclear, that is a good reason to Contact Support before you need help urgently.
Step 2: Check Backup Frequency and Retention (What “Daily” Really Means)
Two words get mixed together constantly: frequency and retention. Frequency is how often the system creates a backup. Retention is how long those restore points remain available. You need both.
If a panel says backups are daily, that only answers half the question. Daily for how long? Three days? Two weeks? Thirty days? If you discover a problem late, the newest backup may already contain it. The restore point you actually need might be older.
A practical way to think about it:
- Low-change sites: daily backups may be enough if the site changes slowly and email volume is moderate.
- Frequent updates: if you change plugins, content, pricing, forms, or DNS settings often, you benefit from more restore points.
- Higher-risk work: before migrations, redesigns, bulk imports, or major plugin changes, you want a fresh checkpoint you can identify later.
The tradeoff is not “more backups are always better no matter what.” The tradeoff is whether you can restore the right point with enough confidence. A panel full of restore points is only useful if they are labeled clearly enough for a human to pick one without guesswork.
Record these four details somewhere your team can find them:
- The last successful backup time.
- The oldest restore point currently available.
- Whether email is included in the same schedule or handled separately.
- Whether you can create a manual backup before risky work.
This is also a good moment to avoid vague comfort. “Daily backups” can be fine. “Daily backups retained for 30 days, with manual restore points before major changes” is far more useful. If your team keeps operating notes in a shared document or private repo, even a simple checklist stored on GitHub can keep restore details from living in one person’s memory.
If your current setup does not give you enough restore range for the way you work, Request Hosting Plan based on your actual backup and restore needs rather than a generic feature list.
Step 3: Review Restore Options in the Control Panel (and Expected Downtime)
Before an incident, you want to know whether restore is mostly self-service, mostly manual, or a mix. Control panels usually land in one of two patterns:
- One-click or guided restore: simpler, faster to start, and better for routine recoveries when the scope is obvious.
- Manual or support-assisted restore: slower to begin, but sometimes better when you need partial recovery or when email and website data are handled differently.
Neither model is automatically wrong. What matters is whether the workflow is visible before you need it. Open the restore area and check for:
- A visible restore action or support handoff path
- Clear scope markers such as files only, database only, full account, or email-related recovery
- Any confirmation screens that explain what will be overwritten
- A restore log showing when restores started, finished, or failed
- Expected downtime or at least guidance on whether the live site may be briefly interrupted
Downtime deserves plain language. Restoring a live site can mean a brief interruption, a maintenance window, or a longer recovery depending on how much data is involved and whether email or database recovery is separate. This is not a reason to panic. It is just something you should know in advance. Calm beats surprise.
Also check the supporting pieces around the restore itself. After recovery, does the domain still point to the right place? Is SSL still valid? Are forms still talking to the right mailbox? If you use a DNS layer such as Cloudflare, note where DNS and certificate checks happen so you are not solving the wrong problem after the restore finishes.
Here is the short “what good looks like” checklist:
- Restore controls are easy to find.
- Scope is labeled clearly.
- Logs exist.
- Downtime expectations are explained.
- You know whether email recovery follows the same process or a separate one.
If your team needs a lightweight internal handoff tool for restore notes, approvals, or incident logging, a simple web app generator can be a useful resource for structuring that workflow without implying any hosting affiliation.
Step 4: Do a Low-Risk Restore Test (Prove It Works)
This is the step most people skip, and it is the step that makes the rest of the plan real. A low-risk restore test means you prove the workflow in a staging copy, temporary subdomain, or other safe environment before the live site is under pressure.
Your test does not need to be theatrical. It needs to be specific. Choose one of these safer patterns:
- Staging copy: restore into a staging environment if your control panel offers one.
- Test domain or subdomain: restore to a low-risk location where you can inspect the result.
- Support-assisted test: if the platform does not expose staging directly, ask support how they recommend validating restore safely.
Then validate the outcome in plain business terms:
- The homepage and a few critical pages load.
- WordPress admin access still works.
- Database-backed content such as recent pages, forms, or settings appears as expected.
- Media files are present.
- A high-level email behavior check still makes sense, such as form notifications or mailbox access where relevant.
A quick example: if you restore last Tuesday’s copy to staging and the site loads but the admin login fails, that tells you something useful before an emergency. If the site loads and the content is present but form notifications no longer route correctly, that is also useful. The point is not to prove perfection. The point is to learn where the restore workflow ends and where follow-up checks begin.
Record the result after the test:
- Which restore point you used
- Where in the control panel you started the process
- How long it took
- What worked immediately
- What still needed manual review afterward
If the result does not match expectations, do not improvise on the live site. Roll forward or repeat the test with support guidance. A restore plan is allowed to be boring. In fact, boring is excellent here.
For related backup and hardening context, keep Security & Backups nearby as the broader reference, but keep this restore test focused on recovery, not on re-listing every security feature in the account.
Step 5: Create an Incident Checklist (So You Don’t Improvise)
Once you know what is included, how long it is kept, and how restore behaves, turn that into a short incident checklist. This is the part that saves time when something breaks on an ordinary weekday and nobody feels particularly philosophical.
Before you change anything, stop the risky action if possible. That may mean pausing plugin updates, taking note of the last change, or preserving error details before a rollback wipes them away. Then work through a checklist like this:
| Stage | What to Do | What to Confirm |
|---|---|---|
| Pause | Stop new changes and note the suspected cause | You know roughly when the issue started |
| Escalate | Contact the internal owner, agency, or hosting support | The ticket includes time of issue, suspected cause, and what changed |
| Restore | Use the correct restore point and scope | You understand whether files, database, and email are separate |
| Verify website | Check site availability, admin access, key pages, and forms | The website is functional, not just online |
| Verify domain and security | Confirm DNS still points correctly and SSL is valid | Public visitors reach the right site over HTTPS |
| Verify email | Check webmail access, mailbox status, and message routing | Email works for the affected addresses |
Your post-restore verification list should include both sides of the business:
- Website: homepage, top service pages, contact form, WordPress admin login, latest content, and any business-critical plugin behavior.
- Email: webmail login, affected mailbox status, test send/receive flow, and confirmation that routing still points to the intended mail system.
If domain details are in doubt after recovery, ICANN Lookup is useful for checking ownership and registration context, while your DNS provider dashboard helps confirm current records. If the incident involved a WordPress update or plugin change, WordPress.org is a reasonable reference for release notes and plugin details while you confirm what changed.
Email-Specific Considerations: Webmail, Missing Messages, and Recovery
Email adds an extra layer of confusion because “it is not restored” can mean several different things. Sometimes messages are truly missing. Sometimes the mailbox exists but the user cannot sign in. Sometimes the messages are present in webmail, but a desktop client is looking at the wrong folders. Sometimes mail is not missing at all; it is simply routing somewhere else.
Start with webmail because it gives you the cleanest test. If the mailbox will not open there, Contact Support, but first confirm whether Inbox and Sent look normal when access does work. That separates account access issues from device-specific client issues quickly.
Then check these email-specific points:
- Account status: was the mailbox changed, disabled, or recreated?
- Password and recovery path: does the user need a reset after the restore?
- Message location: are messages actually absent, or are they landing in a different folder, mailbox, or client profile?
- Routing: do MX and related DNS records still point where mail should go?
- Client configuration: if webmail works but the mail app does not, the issue may be local configuration rather than restore failure.
A good support request for email includes the affected addresses, the approximate time window, whether webmail works, and whether the problem is sending, receiving, or both. That is much more useful than “email is down,” even if “email is down” is emotionally accurate.
Questions to Ask Support Before You Need Them
You can save a surprising amount of time by asking support a few direct questions now instead of during an incident. Here is a ready-to-send list:
- Restore timeline: “How long do restores usually take for website files, databases, and email-related recovery?”
- Coverage: “Do backups include website files, the database, email accounts, and message history, or only some of those items?”
- Verification: “After a restore, what do you check to confirm the website and email are working normally?”
- Downtime: “Should we expect any interruption while a restore runs, and how will you communicate status updates?”
- Customer-side tasks: “What should we confirm on our side after restore, especially for DNS, SSL, webmail access, and client settings?”
If your provider cannot answer these clearly, that is useful information. So is the opposite. Clear answers usually signal a service team that has seen normal recovery work before and documented it well.
Next Step: Get Started With a Restore Workflow You Can Trust
The practical next move is not to wait for a crisis. Review the restore section of your current account, confirm scope, write down retention, and run a low-risk test. That turns backups from a comforting sentence into a recovery plan.
If you want a setup built around clear restore options for website and email, Get Started. If you are comparing plans and want backup scope and restore timing to be part of the decision, Request Hosting Plan. If you want a direct answer to the operational question, Contact Support and ask: “Which restore options are available for files, databases, and email, and how do I test them safely?”
The point of all this is not to eliminate every problem forever. It is to make recovery calmer, faster, and less improvised the next time something ordinary goes sideways.